Monday, May 18, 2020

Arts Festival


My Project

Due to the pandemic, this was the furthest that I was able to get, in completing my project for the keyboard:
I was not able to light up all the keys because I did not have time for it. However, I was able to create the basic structure for the keyboard. My intentions were to first create the base model of a tkl keyboard, then add my own designs to it. Plans were to create the small details of a keyboard so that when I animate it all coming together. It would have more components, adding more variety to the construction of the keyboard. 

Process

In the process of making the keyboard, I made the switch to the new version of blender. The transition wasn't bad at all, and I like the new version of blender much better. Moving on to the creation process of keyboard:

Base of Keyboard


Making the Switches


Adding Switches to Keyboard

Making Keycaps


Adding Simple Texture and Lighting (3 designs)


Adding Lettering


Monday, May 11, 2020

Design Process Investigation

The Design Process

From what I've learned, the designed process "is an approach for breaking down a large project into manageable chucks. Architects, engineers, scientists, and other thinkers use the design process to solve the variety of problems. Use this process to define the steps needed to tackle each project, and remember to hold to all of you ideas and sketches throughout the process."

In the website that I have done my research, they showed 6 steps for the design process.

Define the Problem

You can't find a solution until you have a clear idea of what the problem is. By clearing defining the problem, it will allow you to go about the process in a much more structured way.

Collect Information

Collect sketches, take photographs and gather data to start giving you inspiration. The only way that you're gonna be able to create something that will last, is if you educate yourself in the topic or product that you are trying to improve.

Brainstorm and Analyze Ideas

Begin to sketch, make, and study so you can start to understand how all the data and information you've collected may impact your design. Don't forget that you're not the only one that comes up with ideas, and someone else may have an intuitive solution, that you may have overlooked. You can take that and incorporate it into your design.

Develop Solutions

Take you preliminary ideas and form multiple small-scale design solutions. One solution never seems to be enough to fix the problem. When you bring out a product that solves one problem, it won't satisfy the user as much. If you put out a product with much less flaws than the last, you will impress the user.

Gather Feedback

Present you ideas to as many people as possible: friends, teachers,  professionals, and any others you trust to give insightful comments. The best way to please the people, is to know what the people want.

Improve

Reflect on all of your feedback and decide if or to what extend it should be incorporated. It is often helpful to take solutions back through the Design Process to refine and clarify them.

Monday, May 4, 2020

Web Designer Investigation

Web Designer

What is web design?

After searching through some websites, I found some detailed and some not so detailed. Some ranging from, "Web design refers to the design of websites that are displayed on the internet". To, "Web design is the process of planning, conceptualizing, and arranging content intended for the internet. Modern web design goes beyond how things look (aesthetics) to include how things work (functionality). Web design is not limited to websites as it includes other uses such as web apps, mobile apps, and user interface design". Strangely enough, it was quite easy to find a lot information about web design on the web...

From what I have learned from what I've read, web design has a lot of potential and allows someone to really create their own business. It allows you to put your opinion out there, and people can go to your website. Almost every modern business now needs to have a website in order to survive. You need that quick communication with the outside world, so that they can interact with you and your website. If you don't have a good website, then they will most likely be not willing to learn more about you and whatever your pursuing or doing. 

Web design surrounds our lives, it's hard to go a day without interacting without some of sort of online fabrication made by someone or some company. As the name entails, it involves the creator to think of some way to make it most intuitive for user experience. The designer needs to think how the user will think when first going through the website. Will they be lost? Will they be able to find what they want in a reasonable amount of time? Will the process of buying the product be nice and simple for the user? You need to ask yourself so many simple question when designing a website, or else your website might fail.

Web design is a rapidly growing thing, you see software that people can use to make their own website, but guess what, that also involves an aspect of web design. The layout of the website needs to be clear, it can't be annoying to have to click on the super small button that you finally found in the bottom right corner of the screen. Web design is also very easy to get started with, you don't really need any money to start and there are so many tutorial on the internet. Personally, web design is a great way to start if you want to grab your creative side on the internet.

Tuesday, April 28, 2020

Investigation Blog 4/28/20

Concept Designer

What I think think about being a Concept Designer before learning about it =>
I think that a Concept Designer is someone who obviously thinks up ideas that may be useful to be put into fruition. 

It was hard to find any answers from google about the sole purpose and role concept design has. After some searching I found an article, What  is Concept Design in Product Development?, and it showed a little more to what concept design is. It says that in 2007, a Danish agency FORA said there is "no collective perception" of concept design. Then summarizes that concept design, "is the solution to a problem that has not yet been solved or which so far has been solved unsatisfactorily."

I think as you break the larger concept of product designer, it can be easier to see the steps that are involved into making a product. Concept design is a subclass of product design, which I think is the very first step that we have to take when looking to create a new product or make one better. Concept may start out to be a random thought and turn into a real product. If you do not have a concept, you are just going to be lost and have to end goal in sight. Therefore you must first think of a concept that you want to see come alive, then act upon it. Now, I don't think that concept design should just stop when you randomly think of something that you think is cool. Grab the opinions of others and see if it really is a common necessity and that people would use if they were able to get their hands on it. Once you have verified that your idea or concept is something that would be in demand by other people, that is when you start making a blueprint of what you have in mind. Start creating a more detailed picture and continue to brainstorm until you feel that it meets the needs of the people you interacted with.

The article defines concept design as "the initial big picture or macro design. It shows us what problems the product will solve, how it will solve them, and what it will feel like as it is solving them. Arguably the most creative stage of product development, concept design is stickies slapped on whiteboards, ink and wash, napkins and crayons even. It calls on us to consider sweeping ideas and all the various possibilities. The more the better. In concept design lies the very soul of innovation.

Everything needs some sort of foundation in order for it too survive. Without that strong foundation, it will break down in a matter of time. When you don't have a strong concept to rely on, your product most likely won't do as well as you may think it will. You must have a concept that is strong and demanded by many in order for it to become something greater.


Sunday, April 26, 2020

April 20-26 Investigation blog

Product Designer

What is Product design?

It is commonly known as the holistic approach of building a new product from start to finish. This covers everything from doing market research, identifying problems, product development, designing informed solutions - and everything in between. Still, this definition of Product Design could read pretty vague.

From the perspective of a product designer, Martha Bergmann, she says that "product design is about creating products that meet the needs of its users through business strategy, data analysis, user experience design, user research, user interface design, motion design, mock-ups, and prototypes. It's all about problem solving and design thinking, which is part of that product design process." She brought a lot of different types of things that go into the process of product design. I feel that I can summarize this into something really simple, creating something that is optimize for a user. Anything that involves designing, should always have the user experience at the forefront of their mind, because it matters most what the users think.

Another product designer, Elona Jaquez, says "product design is the intersection of the various UX design disciplines that go into creating modern digital products. These generally include UI design, interaction design, user research, information architecture, problem definition and design thinking, prototyping, visual design, motion design, and management of design systems. Jaquez brings a lot more vocabulary to the table when it comes to what is need for the product design process. Once again, there is a common focus on the experience of the user. Even though I boil it down to the simple definition, it doesn't mean that there isn't more that goes into the making of a product.

Finally, Andrew McKay, who is a Sydney based Product Designer focused in the mobile app space, has been working along side leading Aussie apps. Andrew McKay states, "one of the biggest differentiators between a traditional user experience role and a Product Designer role is the life cycle of the designer's role. As a product designer, my role is to not only deliver to a client's brief but to also maintain and constantly iterate and improve on that product, based on the user base and the original assumptions evolving into new pathways." This is a complete different approach that McKay came about describing what product design is. He goes into the life cycle of a product designer and that there is more to it than you may believe. He says something that I completely agree with and think that every designer should do, and that is to continuously improve on your own product. No large, successful, and growing company would be able to be where they are without constantly improving on their product. If they were to ignore their problems, they would crash in no time.

Sunday, April 19, 2020

April 13-19 Investigation blog

What is Industrial Design?

Design => A plan or specification for the construction of an object or system or for the implementation of an activity or process, or the result of that plan or specification in the form of a prototype, product or process.

Designer => The person who produces a design, which is a term generally used for people who work professionally in one of the various design areas

Examples
1. Textile designer
2. Fashion designer
3. Product designer
4. Concept designer
5. Web designer
6. Interior designer

The rational model

The rational model was made by Herbert A. Simon, an American scientist, and Gerhard Pahl and Wolfgang Beitz, two German engineering design theorists.

It consists of:
1. Designers attempt to optimize a design candidate for known constraints and objectives
2. The design process is plan-driven.
3. The design process is understood in terms of a discrete sequence of stages

My Thoughts on the Rational Model

I think that it is something that I would typically follow throughout making some sort of design for either the project that I was working on, the keyboard. Or anything else that I would go about thinking to improve a design on. I like the first step, because I think that is something that should come naturally to someone who wants to design something. I take something that I already know exists and try to think of ways to improve it. The rest of the model seems a little to robust though for my liking, I like to grab an idea and continue to improve as I move throughout the project. When I think of something that is plan-driven, I think that you get so focused on the plan that you lose the purpose that you started out for. And that is to improve the thing that you are working on.

Tuesday, March 17, 2020

3rd Marking Period Blog Post

3rd Marking Period Blog Post


Intention Definition & Exploration of Ideas

I have been working on trying to create a more efficient design of a keyboard. This falls into the category of industrial design. Industrial design focuses on how things can be improved and how things may be constructed to allow the user or person experiencing whatever object that is before them in the best way possible. My focus, being on trying change the layout of the keyboard, is to find a way so that they layout of the keys may be organized in a fashion that is the easiest for the user. The keys should be layed out in a way that each finger is used to the best of its ability. Even though that this sounds weird, I believe that this is a way to think about constructing the keyboard. Thinking in this way will help me reach conclusion than just experimenting with the layout of the keyboard and spending an unnecessary amount of time testing things out.

Planning

 I was planning to completely finish the keyboard, and start incorporating my own designs in blender. I would have to make the letter on the key caps and then make them transparent so that the light can illuminate the keyboard more. You would also be able to see which key is which. I went about this process by first creating all of the letter objects for each key, sizing them to a reasonable scale. After doing this for each key, I then would convert the letter(s) into a mesh, then lower them so that they were in the key cap properly. Once I have lowered and scaled it, I would use boolean modifier to then combine the two together. Following the boolean modifier, next I would go into edit mode on each key cap. Grab the faces of the key that weren't transparent and convert them back to their original texture. When all of these steps were done for the entire the keyboard, I then render the picture to see if there were any problems with the lighting, and fix any mistakes accordingly. Finally, I would move onto adding in my own designs, trying to make it look appealing and make it efficient for the user.

Producing

I haven't been able to execute everything that I have planned for. I have run into some problems that have really stalled my progress completely. When I was first trying to combine the two texture, I didn't know that I would have to use something called bool tools. Once I installed bools tools, I was able to get the rest of the keys done for the most part. After this, I moved the keys down to the keyboard base, and checked out what it looked like in the rendered view. The lighting was a little dull, so I continued to try bring up the strength of the lighting. I realized that it wasn't looking the way I wanted, so I decided to grab of the faces of the lettering and turn them into an emission texture.

This image shows how I want the key to look at the top of the keyboard, rather than the bottom of the keyboard. Some of the letters, like "f" and "k" weren't even combines properly. The other keys don't show the lighting that well, and look very dull to the ones that are at the top of the keyboard.

Evaluating

When using the bool tools, it worked for the most part. It would sometimes not combine them correctly using the union modifier. It would still cut off some of the transparency for the top part of lettering. I would then have to go into the knife tool and cut a line on the top of the key cap. Merge the two vertices from the knife tool and the original vertices of the letters. Go inside of the key and convert those faces to the transparent texture. Then the all of the key caps were completed. Continuing from this, I couldn't find a way for the lighting to go through the key cap like I wanted to. It would be too weak to easily see the lettering from the key. Even though I brought the strength of the light in the switch as high as I thought it would really make a difference. So now, I am in the progress of the grabbing all of the faces of the letters on the key cap and turning them into emission textures.

Integrating

I learned that there is hopefully a much faster way to go about this. I know that this is my first time making the keyboard, and there were many steps that I could probably of taken to make the process faster. It was also moving to the new interface of Blender 2.8 that made the process a little slower. Next time when going into something that involves lighting, I will do some more research to see if their were something that I could have done instead of an emission light. Everything that I have done this marking period, seemed to very repetitive and tedious work, which was really hard to have a steady work flow. It also had some bugs when going through it, which also slowed down the progress.


Monday, March 2, 2020

3/1/20 Work Blog

I was only really able to work three out of the five days last week, but I was still able to get the lettering on the keyboard done. There are a few problems with it though. When using the bools tools to combine the lettering with the key cap. It didn't always go the whole way through the key. So now, I have to use the knife tool to make a connection with the letter and the surface of the key cap. Then, I will have to connect the vertices and then grab the face, and set it to the transparent material. I will repeat this process until the keys no longer have this flaw. This should hopefully take me no longer than two days. Then, I will check what the keyboard looks like in a rendered image. After that, I will make any changes that will make the lighting on the keyboard better. For example, making more of the switch transparent so that the light on the switch can reach the lettering on the key better. Once I finally complete this. I wills start implementing my keyboard designs. I hope to be able to start that this week, however, I will only have three days to do so.

Sunday, February 23, 2020

2/23/20 Work Blog

I am still working on completing all of the lettering on my keyboard. This process may be one of the most repetitive parts of completing the keyboard. I have to center the text onto the key cap, then I have to convert the text object into a mesh. Then I have to use the bool tools to combine the key cap with the text. After joining the two objects, I have to go into edit mode to assign the key cap material back to the key cap, because when joining to two object it takes on the text material. That's to do one out of all the keys. So I think that I should have the keyboard completed by this week. Then I will start moving onto integrating my designs on the keyboard. I don't have any pictures to actually show how much more to do.

Sunday, February 9, 2020

Progress Blog 2/9/20

Progress Blog

Last week, I started working on finishing my keyboard, by starting to add all of the finishing touches. I watched some video on how to add text into the 3D environment. Then I went into edit mode to change the text to whatever it needed to be. Then I converted the text into a mesh so that I can combine it with the key cap. Boolean modifier would not work, so I had to install bool tools. I used the union modifier and then had to choose all of the face on the key cap and convert them back to the original key cap material. I am not completely done with adding all of the labels on the key cap. I think that I should be able to complete in two weeks, because it is a lot of repetitive and time consuming work.

Sunday, February 2, 2020

Marking Period 2 Blogs Review

5 Classmates Presentations

Geo

I liked Geo presentation because it shows that a lot of work went into his video and that he really loves what he does. When he was talking about what he does to make the song. It seems that it takes a lot of work to do produce the song. Then when it goes into making the video, it takes courage to go out into public and get the settings that he wants. In fact, he took some of his new cautious video in a grocery store. He probably had people watching and wondering what he was doing. If he did not edit the video at all, I bet that it would look pretty awkward and they would just look like they were mouthing words and moving their bodies in an awkward fashion.

Tristan

Tristan is also another person that put a lot of work into what he does. He probably spends most of his free time editing and recording his short films. He also explores going outside of video editing and created a nice routine for editing his videos. He started doing music and sounds for effects and background music that he couldn't find or be satisfied with on the internet for free. 

Caleb

I find what Caleb is interesting because he wants to try to basically create a new scene for people to fight. I think that this isn't as simple as someone just placing buildings and walls randomly. You have to think where the building need to be placed because you want the player to move strategically throughout the map that they are given. You also wants walls to be placed in which the player can peek on the sides and create angles so that they can hold the enemy team back.

Carrie

I think that Carrie's is interesting and different that than the others in how he goes to the animated side of thing. Everyone else mainly focused on the 3D models animations or filming real people. However, Carrie is drawing everything that he wants to animate. It's also interesting in how he is going about it. He records real life video and then traces over it frame by frame. I also think that you can learn from his work, in how he sometimes doesn't want to try new things that may speed up his progress.

Andrew

I thought that his video on Las Vegas was very well done. There were a lot of things that were impressive when watching this video. You can first see that there were a lot of work put into this video. First thing that I noticed was the quality of the scene that he took of. Every short setting that was shown was all very appealing to the eye. Another thing that I took notice of was the quality of music. When transitioning to another setting of Las Vegas, it was always on the downbeat of the song. And it would progress like you were walking through where he was.

Sunday, January 26, 2020

1/26/20 Investigation

1/26/20 Investigation

I went into trying to figure out how to imprint letters onto the top of the key caps on my keyboard.


It talks about how to first create text in blender and then it talks about the how to have different types of fonts. I didn't really have to get that deep into the video because all I need to know was how to create the text, which is very simple. Once I have the text done, I'll just overlay it with the right key cap and then use a boolean modifier to combine them. Before that though, I plan to make the letters somewhat transparent, so that the light can travel through them like in a real keyboard.


Saturday, January 4, 2020

Marking Period 2 Blog

Marking Period 2 Progression


Intention, Definition, and Exploration of Ideas:

My intention this marking period was to pay attention to what went into creating a keyboard, try to make each component of a keyboard to the best of my ability. I tried to do this, so that it would create a realistic sense and feel like it was an actual object. I am in the process of trying to bring the ideas that I have in my head and try to bring them to more of a physical and visible blueprint. I chose to do the keyboard design, because it seemed easier and a little more practical than the other idea that involved the tablet. I want to create different types of keyboards that may bring more capability to how they are used, and possibly make them more efficient. As said in the previous marking period blog, I want to have some of the keys moved to different places, add new keys under the space bar, and some other thoughts. The first design, I plan to make the 60%-65% keyboard, where the number pad would be removed. This wasn't necessarily because it was easier to model, it was just that I happened to find a good reference image and it was overall less work to do. The topic that I chose what industrial design, which in this case, is where I take an existing object and try to improve upon it current state. 

Planning:

I had some diagrams in place of what I wanted to do, however, I needed somewhere to start in blender. I tried looking through the internet to find some models that fit the conditions of how I wanted the keyboard to be structured. Unfortunately, there were no keyboards that were what I wanted and didn't cost any money. So, I decided to make I own model of the keyboard, something simplistic and something that had each component that I wanted. I wanted to make the base of the keyboard, the switches, and the key caps. These are the main components that are mostly visible when you see a keyboard, and it would be enough to make an animation out of. First I started on the key cap of the keyboard, which was the easiest and the least work of the three. Then I continued onto the base of the keyboard, which was the repetitive side part of making the keyboard. Finally, I moved onto the switch which was took the longest out of the three objects. The switch is made out of four components. With all of these models, they are simple models and do not have a lot of detail put into them. However, when put together, it is hard to tell. I made a simple keyboard, which does not have any of my ideas put into it yet. At that point, I just wanted to make a keyboard that looked relatively realistic and had all of the components that I wanted. Putting together the keyboard was just copying, pasting, and moving a lot of objects. I first took the keyboard's base, and then added a switch into each slot in the keyboard. Then copied the key caps and lowered down to the right height. I though that this would be the easiest way to go about things because I can take this base model and modify to look like the other designs that I have in mind.

Producing:

It was a slow process, but I managed to get most of the keyboard done.

This is the reference image that I used for creating the base and the keys of my keyboard.

I used arrays to create multiple keys and then sized them if need and placed them above the location that they should be at. I had to use a slightly different model for the space key, because it does not dip into the middle, it has a convex sort of shape.

In progress:


Finished key caps:


Moving onto the base of the keyboard, I had to manually insert the slot for each switch, because I didn't know how to do it any other way. This was a very repetitive process, because it was a lot guessing and trying to stay as consistent as I could for placing the location of the slots.

When in progress:


Finished base of the keyboard:


Now onto the switches of the keyboard, the hardest part of the project, main because the only images that I could find were isometrics views, or 3D models that were already created in another engine.

In progress:


Finished switches(put altogether):


Finally, putting the keyboard together:


These are 3 sample images that I rendered out to see how the keyboard turned out.


Evaluating:

I did not get as far as I wanted to, where I would get more involved with the materials and making more designs that I have planned. However, the process in making the switches was slightly annoying being that I couldn't make them as nicely as I could've had with a better reference image. I have gotten past the most time consuming step, now all I have to do is make do some revisions on the keyboard to make it look a little better. Change some of the materials on it and use it as a base model for my other designs. Once I have completed the other designs, I will then move onto the animation and lighting of the keyboard, to give the viewer of how all of the components come together. Everything else in the process was not difficult, it just took more time than I thought it would've. 

Integrating:

I have learned some new things like arrays, bevel curves, and got more used to the layout of blender 2.8, which will help speed my progress through this project. I first plan to edit how my keyboard look, possibly making the keyboard switches transparent so that the light can reach more surface of the keyboard. Then I have to add on the lettering on top of the key caps, also making them transparent. After that, I will then move onto making my other designs of the keyboard, seeing how different designs look in 3D. I may possibly try 3D printing the designs to see how they may feel. However, I probably won't start that until I have completed enough animations to satisfy me. Speaking of animations, I will make an animation for each of the my designs, if I don't get carried away with making designs. Each animation will have their own unique lighting and animation of how the keyboard comes together.

Sunday, December 8, 2019

12/8/19 Work Blog

12/8/19 Work Blog

I have finally moved on to working on the MX switch model of the keyboard. I have chosen an isometric model of the switch, so there is a chance that I may create a very out of scale or somewhat deformed version of the switch. I will constantly check it with the other parts of the keyboard and make sure that it will stay within a reasonable size of the key caps of the keyboard. So far, I have only created the base of  the switch. I used the mirror modifier, where I would only model one fourth of the switch and then go off of that. I used more of the bevel curves to smooth the edges and make it look more realistic. Over all, it was kind of an easy task, nothing that was completely new to me. I probably did not model it in the most effective way, but it looks fine to me. I still have the center of the switch to do, but I don't intend to do so until I have the rest of the switch completed for reference.

insert image of the switches here...

Sunday, November 24, 2019

11/24/19 Blog Post

11/24/19 Blog Post

I have finally finished the base of the keyboard. Even though it probably was not in the most efficient way made, it was a very repetitive process. I think that the base of the keyboard turned out pretty well, using the image as a reference. I didn't make any checks on the actual measurements of the holes of the keyboard base. I made the keyboard have some sort of holes, because with most gaming keyboards, they contains mechanical switches which sometimes be replaceable. Those switches are then placed into the inserts of the keyboard base, and finally the key caps surround the switches. If the inserts are not far enough into the base of the keyboard, it can easily be pushed further down into the keyboard base.


The next object that I have to move onto is the switch, will be the most challenging part of the whole entire keyboard. I was not able to make any progress on it last week, because I was trying to find any tutorials on it but had no success. I then tried to find some pictures, but they were not to my liking because I want to make the individual parts of the switch, not the switch entirely connected together. This way the animation of the keyboard can be more dynamic in how it look, feels, and how it comes together. I can find the individual pieces but not in multiple views, just one side angle. I will either have to settle with the connected switch or try to do my best with the limited view of the  multiple pieces of the switch. 

Once I have finally completed the switch, I will then start with the lighting inside of the switches, this should not be hard because, they should already have a component for the lighting part. Then I just have to made part of the switch transparent, which still will be new for me in Blender 2.8.

Monday, November 18, 2019

11/17/19 Blog Post

My Progress


This is my current keyboard that I am using as a reference keyboard which is a 60% keyboard:


At first I focused on the keys of the keyboard, trying to make then curved. I learned how to use Bevel curves and learned more about the interface of blender 2.8 and where everything is. I struggled at first with where everything was and didn't know how to view selected object. It was a little bit slow at first, but then I started to become more comfortable with how everything was working.

These keys were my start of making them, but I had to start over because they were not hollow. When making the keys, I also learned how to use arrays of object and them partition them, making them all their own separate objects. I started over and then make them hollow inside because I am going to make the switches inside the keys, which allow the keyboard to know when a key is pressed.

Then I moved onto the new keys, here is some pictures.


Once completing the keys, I then moved onto the base of the keyboard, which is what I'm still working on right now. Here is the current progress right now:


The progress is kind of slow, because I can't find any tutorial that shows me through the steps of how to make a keyboard in each component that makes it up. However, I think that everything is going well and that I am most likely going to finish the base of the keyboard.

Sunday, November 10, 2019

11/10/19 Blog post


Caleb's Presentation

In this presentation, it brought up the topic with creating a 3D environment, which is something that I am interested to be doing in the future. When the topic of creating AR, this is something that I think will have a lot of application to people's lives later in the future. Even though that the technology is not completely optimized for casual users yet, I think it is something that I should start thinking about to implement into some of my later projects. I think that this relates to me most, because it is the closest that I can relate to. This is because we are both creating something that could be manifested into the real world. Even though that he focuses on the gaming aspect, I can think of how you could apply it to the real world, and how I could experiment with the designs that could benefit layouts of cities or something like that. I could also think of making a 3D environment that could be a learning space where people can interact with other people even though they cannot in the real world.

In the image below, I think that this could lead to many things, one being that people could research on what would be the best layout for a neighborhood, or something related to that. You could work on something that could be an interesting building that would be more efficient on the material but also keep the same amount of space as another building the same size.

Sunday, November 3, 2019

11/3/19 Blog

5 Things That Stood Out To Me

Gina Presentation

    The first thing that stood out to me was that was Gina's presentation, because it showed a good use of effects. Something that I would be interested in when making animations for the keyboard. I think that the dissolve effect would be cool adding into my design when creating the keyboard.

Hanna's Presentation

    Not shortly after that presentation, during Hanna's project, she showed how much planning she put into what she wants to do. I think this stood out to me because it was something that I was lacking last marking period. I think that I should have made a better schedule or plan for what I wanted to do.

Tristan's Presentation

    In Tristan's presentation, one thing that stood out to me was how much effort he put into his project. I think that for something to reach a level of value that people will start to respect, you must put your 100% into it. This is what I saw when watching Tristan's film, that he put a lot effort into his project, and he would be willing to sacrifice time so that he could continue to work on his project.

Alan's Presentation

    Alan brought up how he researched the background and history of the video he was going to make. Which is essential to making something the best it can be when incorporating something that Alan is doing. If you go in blindly, you should never expect anything to go well for you. Another thing that Alan did that stood out to me is that you do not have to come up with something that is completely original. You can look back into history, because I can say for sure, there are some interesting stories in the past. 

Caleb's Presentation

    In this presentation, it brought up the topic with creating a 3D environment, which is something that I am interested to be doing in the future. When the topic of creating AR, this is something that I think will have a lot of application to people's lives later in the future. Even though that the technology is not completely optimized for casual users yet, I think it is something that I should start thinking about to implement into some of my later projects.

Sunday, October 27, 2019

10/27/19 Blog Sheduling

10/27/19 Blog

Scheduling My Plan to designing keyboards


10/28/19 (Monday):

Create a 3D keyboard model that I can do revisions and edits on, so that I can start making a more visible and clear object of what my simple designs look like.

10/29/19 - 11/1/19 (Tuesday through Friday):

Continue creating my 3D keyboard model, one that is a 60% keyboard, 100% keyboard or a full sized keyboard, and possibly make a 65% keyboard design. It depends on how fast the other two designs go.

10/4/19 (Monday):

Start exporting the keyboard design to different project files so that I have set up all the different type of designs that I plan to create in the future. Once I have done that, I then plan to start on my first design, which will most likely be a 60% keyboard.

10/5/19-10/7/19 (Tuesday through Thursday):

Continue modifying the 60% keyboard, making it fit the design that I have already completed. Changing the shape of some keys, moving some keys around the keyboard, and some other revisions that would just be come simple extruding or scaling.

10/8/19 (Friday):

Once I finally complete the placing the keys caps, then I will start adding the lighting to the keyboard. by lifting up the keyboard keys vertically around 10 blender meters.

10/11/19-10/15/19 (Monday through Friday):

I will continue experimenting with the lighting on the keyboard, looking at models of over keyboards and the lighting that they use. I will also start testing animating different type of light transitions that and start taking notes which type of light animations look the best.


Sunday, October 20, 2019

Marking Period 1 Progression

Marking Period 1 Progression

Intention, Definition, and Exploration of Ideas:

Image result for ideasMy intention is create and apply these ideas that I brainstorm from my mind and bring it to reality. I want to try to make things more efficient in its design, to make a user's experience as best as it can possibly be. I was brainstorming what type of designs that I should create. First design that I thought of was the keyboard design would be a typical keyboard, but I would make each component that make up a keyboard, I would start my design of the keyboard. I would change the styles of the keyboard to different variations, and show each of them. With each design, I will animation the keyboard coming together, component by component. The next design that I started brainstorming was a tablet design. The tablet design will have the screen size of a typical piece of paper, and with a small border surrounding the screen. On the back of the tablet, there will be a simple keyboard design attached to the back. The keyboard will come out in a way that it will almost give the impression that it was a laptop to start out with. I kept thinking and brainstorming about these ideas, trying to come up with more designs for each one.

Planning:

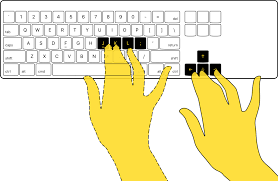
Image result for arrow keys on keyboardI had to make a choice between the two concepts. So I went with they keyboard design, because it had more variety in what the design could be like. I started making expanding on my current ideas and plans that I have already thought up. I first defined what it was that I wanted to base my designs on and what I should focus on when making up these designs. It is to make different models or forms of keyboard, each having their own functionalities and designs. All of the designs will have their positives and negatives to their build, but the variation in the build will create different feels in the keyboard. Another part that I wanted to focus on is that to make it as efficient as possible, in way that the keyboard will be uncomfortable to use. I started with the arrows keys on the keyboard, because I like to use them, but they are in an awkward spot. I don't like how someone must adjust their right hand to always tap an arrow key. So, I started thinking of what could possibly be a better spot. The first spot that came to mind was that the arrow keys could be right below the space bar. I thought that this would not pose any problems because it is "empty space" meaning that its space not being occupied by anything. It would also give your thumbs more of a role to play when typing, because then all you would have to do is reach down and hit an arrow key.

Image result for 60% keyboardMoving on from the arrow keys, I started to focus on 60% keyboards, in how they were trying to make a keyboard as compact as possible. I like this idea because it trying to bring another design that may seem more efficient to certain people, and that it bring another challenge to a design that could possibly benefit it in some way. It attempts to bring all of its most important components together and remove the extraneous. I want to start making some of these designs because it will make me think on how it will improve the experience of a computer user. I also like the design of these because they look very slim and do not take nearly the same amount of space as a full size keyboard.

Producing:

As seen earlier in the blog, I already showed some of my thoughts with the design involving a new location for the arrow keys. So I started thinking of some designs for the keyboards that I have in mind, where they would each have their own pros and cons. Some will have their own feature, while some of the designs will be a combination of the other keyboard designs.

These are two alike designs, where they utilize the arrows below the space bar. Though this design may look very weird, it may bring more comfort to someone who constantly uses the arrow keys.

This design is where the arrow keys are in a square shape, this may be uncomfortable but that will have to come with some testing and actually try the keyboard design out.


This design is where the arrow keys are in a straight line, where this may be more comfortable to some other people instead of the others. 


These are just one type of design that I have, and I am still working on more. I am also still learning this simple interface as well, and it is really nice for making simple blueprints.

Evaluating:

Image result for evaluatingI have not completed any views other than the top, because my main thought process was that the top would give the best layout. So, only focusing on the top view, I set up multiple different designs, each having some benefits and most likely having some downfalls. Looking at the designs with the different placement of the arrow keys, that could something that could programmable by the user of the keyboard. Then the keyboard keys will be able to come off and they will be able to move them around to what would please them the most. I'm only designing the 60% keyboards and making blueprints for them currently. Right now, I need to think of how other people are going to feel about transitioning to something new to this, and how willing they will be to transition over to it. Another thing that my blueprint do not focus on is the coloring of the keyboard, I can add coloring to the keyboard, but right now I want to focus on the layout of the keyboard.


Integrating:

Image result for integratingRight now I am still in the progress of making more blueprints for my thoughts and designs to improving the current design of keyboard. Even though that there probably won't be major difference, it will be the small differences that will overall make the user's experience better. Once I feel that I have made enough blueprints, I will start in blender and make the 3D models of them. Once completing the 3D models of the blueprints, I will then move on to the lighting of the keyboard, and test different type of light styles for each keyboard. I plan for each keyboard to have different type of lighting and hopefully each have their own animation of lighting. If it becomes too much, then I will have some of the keyboards have the same type of lighting and animation. Then, I'll finally moving animation of the keyboard coming together and do this will all of the keyboards. Some will most likely have the same animation coming together. However this is where it really make the keyboard feel like it's being completed and one of the best opportunities to show that they are different. 

Arts Festival

My Project Due to the pandemic, this was the furthest that I was able to get, in completing my project for the keyboard: I was ...